Gorelock 2, New Style

(GAD 2) (Pictured, This is just the Fork, no DR)

The GAD1 and the GAD2 forks have the same features. If you have a Pro sled with a 1.500″ post size and think you will be upgrading to a 2″ post in the future, I would suggest buying the GAD2. That way you will only need to purchase a different size docking ring.  The O.D. of all the rings are the same size. Be sure and double check the size for low mode placement. The GAD2 accommodates the all the post sizes. As before the same great features are still inter-graded. The key features are, no aircraft pin, automatically locks the sled in place, securely holds the sled from flopping from side to side when changing magazines or lenses, the docking ring can be positioned right under the top stage, the post never touches the fork when docking, the Gorelock1 & 2 has a built in 2 degree angle, the sled can be rotated in the fork for adjustments, Blue release levers are on both sides for ambidextrous operation, two handed control on the sled when mounting and dismounting. The new features are; now accepts the largest to smallest post size, starting with the MK-V  4 stage post size of 2.125″, 2.00″, 1.860″, 1.800″, 1.790″, 1.750″, 1.750DS, 1.685″, 1.580″, 1.500″, 1.500DS, 1.495″, 1.477″. The O.D. of all the rings are the same size.

Now sold with Blue Levers. Call if you do not see your post size listed.

Betz Iris Rod Mt. – MDR3 Mt. – QR Mount

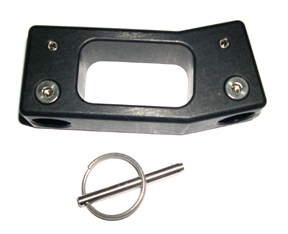
MDR3 Mount bracket (Revised) to interface with the Betz Top Stage (60mm) Iris rod  Mount. This  mount slides onto the Betz or Pro top stage Iris rods.

The 60mm rod spacing is also the same spacing as the Arri Alexa. You will need to add the MDR3 Mt. to interface with this part. The Popper will also work with this part.

The MDR3 bracket mounts to the MDR3 box on top or bottom. Two screws mount from the side in the right-side up position. The Iris rod mount attaches to it in the center of the box.(4 Screws)  The box can be positioned every 90 degrees for what ever cable position you prefer. In the upside down position two screws mount from the side and two on the bottom side.

The MDR box can still be positioned every 90 degrees for cable placement, the box labeling will be upside down. (Shown in pictures)

If you need a quick release, the Popper can be sandwiched in between the two brackets. (shown in pictures)

Anodized black comes with screws!

PAM Kit (Preston Adj. Mount)

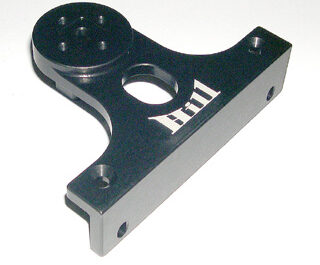
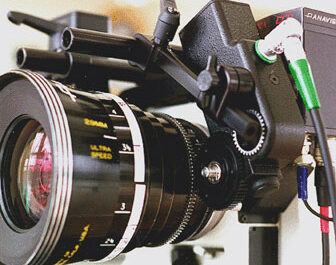
P.A.M. – (Preston Adjustable Mount) Lighter, Better, Stronger, Easier, More Options, Cost Less! The PAM mount allows owners of Preston motors to simplify operation. The new PAM Mount takes advantage of the design of the motor and uses it to the operators benefit. As there is a hole that goes all the way through the motor (the mounting rod), a rosette is secured in the place of the rod. This allows the motor to be used on either side without going through the difficulty of changing the bracket setup. The PAM mount keeps the motor at a right angle to the lens at all times. PAM is positive locking, every 10 degrees to the lens over 360 degrees. The mount is also adjustable vertically relative to the lens by 5″ inches. Attaches to any standard iris rods. PAM is very quick and easy to use. The motor mount can stay built even when not in use. And best of all, the PAM Mount weighs just 3.4 ounces. (This is less than Preston’s current swing arm.) All PAM Mounts are hard anodized black.

In Stock!

Tech Note: 15mm is not 1/2″. If you try and use the 15mm arm on a 1/2″ iris rod it will not work! 15mm is .590″ decimal , 1/2″ is .500″ decimal.

Tech Note: If the lock down screw seems to stop, like it bottoms out. The cause maybe galling, (Adhesion friction) Try a drop of lubrication under the washer.

If the Pam arm seems loose, double check to make sue the iris rod is tight at the camera.

Personal experience: When calibrating the the lens motors, I would hold the motor to the lens when they come to the lens end stops. The motors are so strong they will try and crawl off the gears. Once the end points are set, the motors will not try and crawl off.

MDR 2 & 3 Mount

This is a new mount system for interfacing your Preston MDR 2 & 3 to the GPI Pro Donkey box 2 & 3. This new design will allow the operator to position the MDR box at 90 degree positions. This will allow your lens and power cables to come out the side of the lens if needed. Adjustment forward and aft for clearance of your cables. The other benefit to this design is its simple and quick MDR removal to go to A or B camera. Or if you are an operator that has two sleds one set-up for low mode and one for regular operating, swapping over is simple. The best part of all the Quick release mount that attaches into the Arriflex 3/8-16” screw pattern on the camera bodies. The MDR box will be able to be clocked on the camera to your desired position as well.

Note: There is a mounting difference between the Donkey Box 2 and Donkey Box  3. The DB2 mounts with two 6/32, 2″ spread. The DB3 is three 6/32 in a V- pattern. Please double check what you own!

Part #Pro-DB2 to MDR2     Weight: .10 oz    $200.00

Part #Pro-DB3 to MDR3    Weight: .10 oz     $200.00

Angled J-Bracket

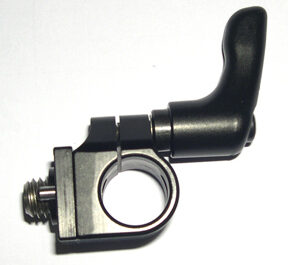
Angled J-bracket for 5/8″ arm post and 3/4″ Arm post.
Note: Now in 3/4″ arm post size for M1
Choose size when ordering.

Arm post not included.


  •  

Quick Release “Popper”

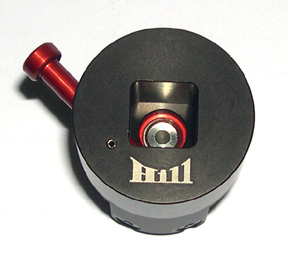
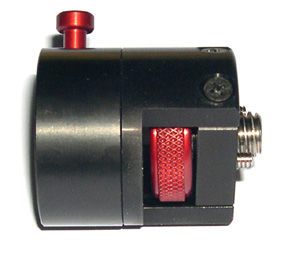
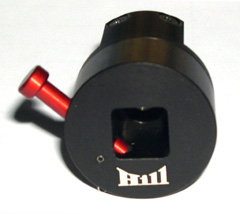
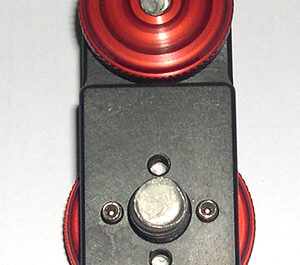
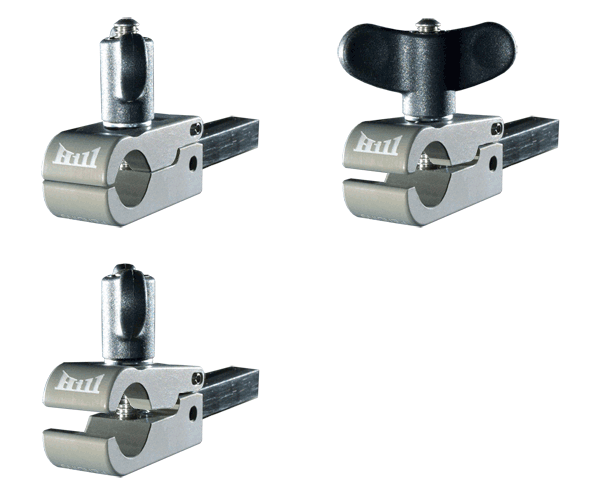
The Quick release “popper” attaches to the Arriflex 3/8-16 mount that is located on the handles. It allows you to mount and dismount the MDR boxes quickly with the push of a button. The square receiver on the MDR bracket inserts into the Quick release receiver. The MDR box can be mounted in four different positions. Once inserted it is locked into place. Push the red button to release. This is ideal for moving your MDR box from the Steadicam to A or B camera. The QR Popper can also be used for assistant monitor, or other accessories that may need to be removed quickly. Sold as shown, Anodized black with red release button and red mounting knob. The locating pins for the Arriflex mount can be removed if used on other camera’s.
QuickRelease3QuickRelease2QuickRelease4

Alexa Lateral 15mm Iris Rod Bracket

This 15mm rod holder attaches to the Accessory Cube or Arri mount. It has the Arri style mounting. Use an Allen hex key and screws onto the Cube, there are two pins on the bottom to keep it aligned. Once mounted a 15mm round Iris rod of any length can be inserted and clamped down securely. Sold as shown. 15mm rods are available at extra cost. Anodized Black.

Arri Alexa LMB

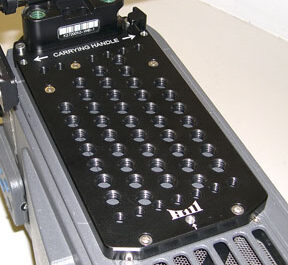
This Alexa Low Mode Bracket fastens to the top of the camera. It is 3/8″ thick lightweight plate so it can be left on the camera at all times. The stock Arri handle will mount to the plate with no modifications. It does not interfere with the viewfinder support block so you have the choice of leaving it on or removing it when you do go into low mode configuration. There are plenty of dovetail mounting holes, there are 5 rows of 3/8-16 tapped holes and two rows of ¼-20 to choose from. Mounting screws are captive. The plate is also great for mounting the camera onto 3-D rigs or for mounting accessories. Anodized Black.

Hill 2-N-1 Motor Mount

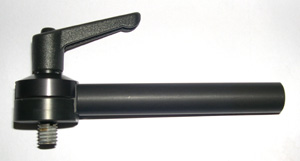
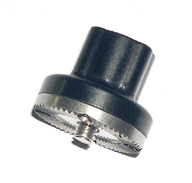
This is a motor rod for Arri cameras. It looks like a lollipop and screws into the rosette where the handle would go. The mating side of the Hill 2-N-1 is made of nylon so it conforms the rosette and will not move. The name 2-N-1 means that it has two uses. The mount can be taken apart so you have a square to round rod that will slip into the square access hole on the Arri BL’s and the Arri 35-III handle.

Accessory Cube

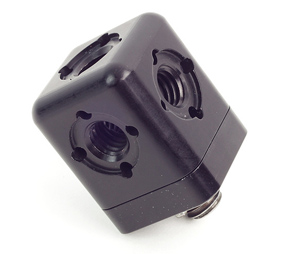
Need to mount your MDR, Cine Tape or some other gadget and ran out of holes. This accessory cube will get that done. Mounts with 3/8-16 screw and pins.(Arri’s pattern) Provides 5 screw locations of the same Arri pattern.

V+F MDR Mount Bracket

V+F MDR Mount Bracket, A simple way to mount the V+F MDR box onto the Arriflex 3/8” mount pattern. The locating screws can be removed to place onto other 3/8”-16 screw holes. (Red Camera) Anodized Black with Red knobs.

PAM Replacement Arms

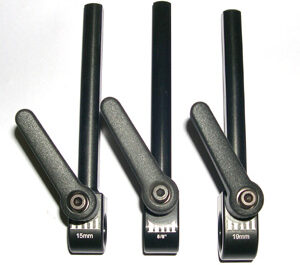
P.A.M. Replacement arms. You have a choice of 15mm, 5/8” and 19mm size arms that clamp onto the same size iris rod. The 19mm arm can be stepped down with the reducers to sizes 5/8” and 15mm. The Reducers simple push into the hole and are captive so they will not fall out. All standard size arms are 5” overall length. The adjustment shaft  is approx. 4” long.

All PAM Mounts are hard anodized black with size laser etched.

Tech Note: 15mm is not 1/2″. If you try and use the 15mm arm on a 1/2″ iris rod it will not work! 15mm is .590″ decimal , 1/2″ is .500″ decimal.

If the Pam arm seems loose double check to make sue the iris rod is tight at the camera.

Personal experience: When calibrating the the lens motors, I would hold the PAM arm to the lens when they come to the lens end stops. The motors are so strong they will try and crawl over the gears. Once end points are set, the motors will not try and crawl off.

Arri 15mm and 19mm Motor Rod

This is a 15mm & 19mm rod that 3.50″ long. It has the Arri style 3/8-16 thread and the two locating pins. It has a knurled knob at the end for easy attachment. Can be used with the accessory cube above or directly onto the Arriflex camera. No Tools. Anodized Black.

Uni-Clamp Shafts

The double D shaft can be swapped out for shorter or longer shafts. Comes standard with a 3 3/4″ shaft length that will give you 4 3/4″ overall length.

I do have some dedicated size arms left over from a special order. These are 15mm & 19mm arms. They only will work with that size iris rod. They are laser etched for the size they are dedicated too. They will not fit three sizes of iris rods just the one size! While supplies last! Will not be made again. Anodized “Black”